Saturday, November 28, 2009
"New" Seat Pan on the Way
Another rusty seat pan, really? Yep. I bought another rusty seat pan off of e-bay. The last one was a cb175 pan that the seller said was a cb200 it was in such bad shape the seller refunded the $10 I paid for it (but not the shipping.) So I have a cb175 throwaway pan.
So another one came up on e-bay. This time I asked the seller to post a photo of the pan. It was rusty and has a rusted hole in it. Because I'm the only idiot who will buy crap like this I was the only bidder .99 + $14 shipping. So we are waiting for this rust bucket to arrive.
If its unusable its $15 for latches, hinges, bumpstops etc. But to make the seat I want I figure were going to do some welding so the rusted out part(s) should be repairable.
Here's a cool seat idea from the $50 mod thread on http://dotheton.com. I like the simplicity of the seat and I'm thinking I'm going to mock one of these up on my "new" pan.
Monday, November 16, 2009
The Rear Fender
This weekend, we put the bike up on the lift and decided to mock up the rear fender supports. The goal was to use a bone stock fender and rotate it around the tire and to mount it on the swing arm and then to make struts shaped like 7's that attach to the fender at the stock location.
When we pulled the shocks to check the travel it became apparent that the stock brackets welded to the fender are too wide and will run into the frame. So back to ebay... now I've got a "new" (rusty) rear fender coming that we will cut off the brackets and make some straight struts, then re-chrome the whole thing.
Here's a shot with the fender mocked-up and a photoshop seat like the silver one I saw on ebay.
Thursday, November 12, 2009
Wish List
With Christmas coming on fast I've been digging around to see what kind of trouble I can get into. Heres a couple of possibilities:
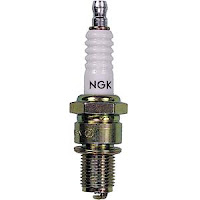
SantaClara Honda has this little beauty that might give us a little hotter spark.
Dear Santa: I've been a fairly good boy...
SantaClara Honda has this little beauty that might give us a little hotter spark.
"So, I have done a little research and come up with a system that will work with almost any conventional system. The only limitation is that the coil you use must have 3 ohms or greater resistance. All the old Hondas I've checked meet this requirement. The system also includes a built in red LED that indicates when the points opens which makes accurate static timing a breeze. Currently I'm testing the system on a 1974 Honda CB200 and it is working perfectly. We plan on offering these for sale on our website after we have tested it long enough to establish confidence. The expected price will be around $35 each." read more hereHow about the seat project? Straight off the boat from Thailand a custom Cafe seat for a CB175. (It will not fit on the Cb200 but its the right approach.) Steel pan and body powdercoated to match the tank and rims? Hummm...
Dear Santa: I've been a fairly good boy...
Monday, November 9, 2009
Yep
Pulled the left carb and cleaned everything. Pulled the petcock and it had rust in it again! So we pulled the tank emptied the gas into a clear container. The rust floating in the gas helped us determine that our tank had let go a few additional treasures. So we flushed the tank with water again and dried everything out. Then I ran down to the gas station to buy a gallon of clean gas.
After putting everything back together and resetting the carbs to the stock 1-1/4 turns on the air/fuel setting (the small screw on the lower left of the carb) and the throttle screw to 2-1/2. She fired right up and I rode it down to the gas station for a fill-up. I left the gas station and made a bonzai run down the main road hitting 65 with crisp throttle response all the way through the power band came up to the stop light and she idled at about 2K. I think we have a winner. I still have a little wobble in the front-end so I might just send it over to Sam's Cycle shop to have them true the front wheel.
Thursday, November 5, 2009
Nope
Battery fully charged and I went for a ride tonight and the bike died on cue. I pushed it home and found the left float bowl was dry. No gas? Pulled the lines, no gas. Pulled the tank and the petcock it was full of rust from the tank. Cleaned the petcock and took it for another ride. The bike died. Sooo... this weekend we'll pull the carbs and see if there is any crap in them. I was thinking I will replace the fuel likes with clear lines so I can keep an eye on the gas flow. We'll see.
Dead Battery
Electrical? My son was riding home yesterday and the left side started cutting out. Then the bike died. We went over with the jumper block and it started right up rode another mile and died again. We did this for 5 miles until we were home.
I rode it the last two segments and noticed when it fired both cylinders were running then first the left side would start sputtering, then the left side would shut down, then the right side would sputter and then shut down.
We're charging the battery and we'll see how she runs. Maybe the charging system isn't doing its job? Maybe we need it on the trickle charger at night? Electrical? Hummm...
Wednesday, November 4, 2009
Give it a Name
So we had a little fun yesterday, my son and I rode to work together. He's got a temp gig near my office and so we fired up the bikes and rode to work together. We hadn't ridden the CB200 at "speed" because I was leery of the old tires so this was a good shake down run. With the new tires and exhaust the bike looks and rides completely different. As we were blasting along at about 50mph I had an epiphany the bike sounds like a swarm of Killer Bees. Now it has a name... the Killer cBee.
On to more practical issues... we had a little smoke coming from the right pipe. It seems I wrapped a little too close to the header clamp. After loosening the hose clamp I was able to scrunch the wrap down about a 1/2" and it seems to be fine now. More serious however is the bike was stuttering at 6000 rpm. I thought maybe it was running lean because of the new pipes. Last night I pulled the carb needles and set the clips to the lowest position. After a couple of test runs I pulled the plugs and they were black (too rich). So I changed the clips back.
On my test runs I felt the left cylinder cutting in and out. Its either fuel or fire. So I switched the fuel lines to see if the petcock outlet was blocked and starving the cylinder. No difference. So I switched the fuel lines going into the carbs to see if the line was crimped or the in-line fuel filter was blocked. The bike still was missing on the Left side. So we've got to look at the fire. This weekend we'll need to do some real testing. It probably something minor but the Killer cBee is being a little testy right now.
So I was looking online for "Killer Bee" graphics and found this article on CB160 racing... "I could swear a swarm of killer bees must be heading toward me."
Monday, November 2, 2009
New Shoes
One of the best improvements you can add to an old bike are new tires. Our CB200 had the original tires which were both dry and cracking. After reading the news groups and scouring the internet I determined that I would use 90/90-18 on the front and 100/90-18 on the back which would still fit inside the stock fenders. The tires I purchased were Duro Cruiser tires.
Dismount & Mount
To mount the tires we pulled the wheels one at a time. First we did the front tire. I put the bike up on the center stand and put a floor jack under the front motor mount. On both wheels just pull the cotter pin on the castle nut and unbolt the axle, slide the axle out and the front tire will roll out. On the rear you'll need to disconnect the brake stay and the brake lever. Take a close up picture of rear of the bike paying attention to the washer stack so you remember how it all goes back together.
Remove the valve stem and deflate the tire then dismount the tire with a set of tire spoons. Some people will use a screw driver for this but you are likely to ding your rims, pinch the tubes and/or hurt yourself. To remove the tire push one side of the tire into the center section of the rim. This will give you the slack you will need to get the tire irons started on the other side. Pull the slack side upward, place a rim protector on the rim in the gap, then insert the bent end of the tire iron into the gap. Peel enough of the tire up to get the second tire iron in and begin peeling the tire off the rim. Insert the second rim protector as soon as it will fit and work around the tire in opposite directions until the top side of the tire pops free. Remove the deflated tube and flip the wheel over and repeat the process.
To install the new tire wet the bead area of the tire with soapy water. Place the tire opening over the edge of the rim and push down firmly. Work the tire down as far as you can, then place the rim protectors on the rim at each edge of the tire-rim overlap. Using the straight end of the tire iron, work the bottom bead past the top edge of the rim. Push the side of the tire that is already on the rim into the rim center to get the slack needed to clear the rim on the far side. The lower tire bead should be on the rim at this point. Put the deflated tube into the tire and feed the valve stem into the rim. Repeat the install process with the top bead. Inflate the tire with compressed air to seat the beads. Once you hear both beads seat, or pop, release the air and replace the valve stem core. Inflate the tire to the manufacture'rs specified pressure in my case this was 40lbs.
To reinstall the front wheel I had to deflate the tire and then it would slide into place. I pressured it back up and its tight but everything cleared perfectly. Since our fender was already out the back tire went right in. The only modification needed for the wider tire was to move the break stay to an outside position on the bracket. We reused the same shoulder bolt but put on and aircraft nut since the cotter pin hole was no longer accessible.
The new tires definitely look and ride much better. The sizes are perfect and we figured out how to reuse the stock rear fender (unmodified) to make a swing arm mounted low fit fender. Stay tuned and we'll get that project underway.
Exhaust and Tires
Saturday it was time to install the new exhaust. Since one of my pipes had broken-off I have one bad and one good OEM muffler. Since I haven't found another header I decided to see if I could remove the good muffler and salvage and both headers for potential re-use if we ever want to go back to stock.
With the header pipe and a destroyed muffler to use as a test dummy, I pulled the bad exhaust off the bike. I found you could rotate muffler on the header pipe which meant the muffler was not welded onto the header. The only thing holding the two pieces together was a steel ring that was pressed on to create the seal. With my vice grips and bench grinder I was able to chew through the ring and the two pieces simply slipped apart!
I decided to create my own slip on system so everything could be taken back apart. My system consisted of a 6" length of 1-1/2 diameter exhaust tube purchased at Pep Boys, a couple of pan-head screws and some Exhaust System Joint and Crack Sealant. The 1-1/2 tubing was a nice tight slip fit right over the header. I left the flange on the header applied a liberal amount of sealer and just butt fit the two pieces together. I drilled a 1/8" hole and locked the two pieces together with a sheet metal screw. The sealer forms a "weld-like" bond but it is one that can be cracked apart for disassembly.
The mufflers have an 1-1/2-ish intake. This is not a slip fit, my guess is its 1-5/8" or some crazy metric size. So I made a run down to Autozone to "borrow" an exhaust spreader. (Autozone allows you to borrow tools, just leave a deposit and bring it back within 5 days.) The plan was to expand the exhaust tube to get a good tight slip fit. The problem was the 1-1/2" expander wouldn't fit into the 1-1/2" exhaust tube they were the same diameter. I would need a smaller size expanded which they didn't have at Autozone.
I decided to go the other direction. I pulled out my Saws-all and cut two cross cuts the width of the blade into the new mufflers. These cross cuts allowed me to reduce the opening to a tight slip fit on the exhaust tube. The exhaust pipe goes in about twice as far as the cuts and bottoms out on the slip in baffle.
The mufflers come with a chrome universal mounting bracket with one hole drilled in it. The muffler has a bolt sticking out the side and you need to find a place to hang the steel strap. To keep the stock rear peg mounts I needed to re-use the stock muffler brackets which have two holes. So I drilled a second hole in the strap and bolted it to the stock bracket. Then I measured and drilled a third hole in the strap for the muffler to bolt into. This process had me taking the exhaust on and off the bike multiple times to make sure everything lined up correctly.
Once it was all dry fit, I pulled the exhaust and drilled a 1/8" set screw hole in the muffler and exhaust pipe. Then I pulled it apart applied more Exhaust System Joint and Crack Sealant and put it all back together. Finished exhaust... no welding.
With two exhaust pipes in hand I pulled out the 1" wrap and proceeded to wrap the pipes. I was taught to start at the muffler and worked my way forward. This way the air is flowing over the seams not running into them. Think of it like rain going over shingles on a roof.
Two wraps at the base of the muffler and a hose clamp to keep it in place. I continued wraping by overlapping each wrap with 1/2 the width of the wrap and finished about 3" from the head of the exhaust. You need to leave room to get the exhaust clamp and clamp locks in place. I finished the wrap by crossing the last wrap under itself and carefully cutting off the "tail" with a box knife this in effect creates a knot at the end of the wrap. Then a second hose clamp over the knot keeps it from untieing.
The end result is a cool old-school exhaust with a header pipes that could be reused to remount stock mufflers. These mufflers create a little deeper exhaust note and I think they sound pretty good! It'll be interesting to see if we will need to re-jet the carbs to make up for the lower restriction exhaust.
Tank Arrives
The tank showed up the following day. I was surprised the post office even delivered it because there was still gas in the tank and the petcock was dripping and had eaten a hole in the box! When I got home there was the distinct smell of gas in the hallway and my wife said "I think someone shipped you a bomb." then she rolled her eyes and walked away.
The tank is perfect and has almost no rust inside. Given the condition of the rest of the parts I was shocked. The donor bike was originally a silver '75 just like ours (that's why I suspicious of the head-light bucket.) The tank had been rattle canned flat black. Which seems to be the most popular color for home resto mods. Given the condition of the tank I decided to have it powder-coated red along with the rims. So I decided to get down to business.
First order of business was to disassemble the wheels. I laid the front wheel on the work bench and took some pictures. This will help to get the spoke pattern correct when its time to re-lace the wheels. Next I removed the speedo drive plate its held on with four phillips-head screws. I put all the parts in a plastic bag and moved on to the spokes. I removed the rubber band the covers the spoke nipples and using a large flat blade screw driver I loosened the spokes after I was half way around everything was loose and I unscrewed the rest of the spokes. This allowed me to pull the hub and spokes out of the rim and then I removed the spokes from the hub. I followed the same procedure on the rear wheel.
The rear wheel has a two-piece hub. One side is the brake assembly that just sits in the hub that acts as a drum. The two shoes are held in place by two springs and they are expanded by rotating the brake lever. These shoes are readily available so I'll get a couple for the re-assembly process.
Now I have 72 rusty spokes, 2 rusty 18" rims, and a dingy front hub and a rear hub and brake assembly. I'm going to send the rims out to strip and powdercoat, I'm going to have the hubs polished and I'm going to buy 80 new 6-1/2" spokes.
Next up was the tank. First I removed the petcock. The bowl on the bottom unscrews and there is a large phillips-head screw holding it in. Next was the rubber pad from the top of the tank. After some head scratching my buddy Jim figured out you pull the rubber down at the base of the tank and it unhooks from a bracket. Then it can slide forward to unhook from the front bracket. There are four tiny phillips head screws holding the chrome trim and four more holding the Honda emblems. This tank has the key latch which is also held in place by a screw. The emblems, latch and screws all want into a zip lock bag and got marked "tank". I learned along time ago to bag and mark everything because who knows when you'll get back to a project. The emblems make the content of this bag obvious but its just good mojo. Last but not least we used a punch to remove the hinge pin holding the gas cap. This pin is peened over so we were careful and tried to not knock off the head. We used a real small punch and were able to roll the mushroom back up. It looks like we might be able to reuse the pin!
With that the "Friday night take stuff apart" session was over. The parts were loaded into Jims truck and I need to come up with some money for the powder coater and the polisher. To do's include getting a new set of brake shoes, a rubber seal for the gas cap and a good cleaning and soaking of the petcock.
Wednesday, October 28, 2009
eBay is Cheap, Its the shipping that will kill you.
So a couple of boxes of eBay acquired parts showed up today. Joy and frustration in one swift motion. I was looking for a couple of parts to replce items damaged when the bike went into the neighbors bushes. I needed:
- Head lamp bucket. - The black plastic bucket is cracked around the edges.
- Lower triple tree. - The left fork stop is sheared off allowing the reflector to hit the tank on full turn.
- Clutch lever housing. - The bottom housing is cracked (...now its just broke).
Monday, October 26, 2009
Turn Signals & Frankenbracket
In my opinion one of the clunkiest items on the stock CB200 are the lollipop turn signals. While some guys may opt to shave them off altogether we decided to keep the signals but to replace them with a set of smaller signals that look better. Mounting smaller lights on the front was a requirement because the stock signals ran into the Clubman handlebars.
I picked up two sets of these "retro" signals from my local m/c parts dealer. They were reasonable at $35 a set.
The front signals on the CB200 are single wire (hot) and the signals are grounded to the frame. These signals are two wire so the first step was to disassemble the lights and cut the black wire down. Next I soldered the ground wire to the spring that sits behind the bulb. The spring makes contact with the housing and the housing grounds to the headlamp mount. Chase the turn signal hot lead into the head lamp and plug in the red wires.
Next up are the rear signals. The stock units mount to the seat grab rail and are not grounded to the bike. We decided to remove both the grab rail and the rear fender and mount our signals in the frame holes where the fender was mounted.
First you need to remove the phillips-head screws that hold on the turn signals. Next loosen the shock mount cap bolts. This will allow the grab rail to slide back and away from the bike. The turn signal bullet connectors (light blue/orange) unplug from wire harness under the seat.
If you want to keep your fender you'll need to make a bracket to bolt the signals to the fender. In our case we unbolted the two nuts on the side of the fender and then removed the two 10mm bolts under the seat and removed the whole fender. There is no need to remove the rear wheel but you do need to unplug the tail light wires from wire harness under the seat. There are 3 wires, brake light (green w/ yellow trace), running light (brown) and ground (green).
With the fender removed, I bolted the rear turn signals into the frame holes where the fender was through bolted. I used a couple of washers for each side made up the difference between the signal post diameter and the fender bolt holes. I had to extend the wires on the signals to reach the wire harness under the seat but then they were straight plug-in connections.
Next up was the tail light. With the fender removed I needed to mount the tail light to the frame. I had a small-ish oval tail light from another project and I decided to bolt together a quick and dirty tail light and license plate bracket. I used a three 6" angle brackets and made a simple Frankenstein assembly. I used two of the brackets to make the main assembly and cut up the third bracket to make the ears and two cross braces. I bolted the whole thing together and drilled a couple of 1/4" holes in the frame seat hump.
The brake light has two hot leads, one is the running light, one is the brake light. I made ground wire with a eye on one end attached to one of the light's mounting bolts and a bullet on the other plugged in to the harness. I'm sure the tail light bracket will get replaced when we get the new seat sorted out but for now it works and makes the bike legal to ride.
Thursday, October 8, 2009
The Exhaust Conundrum
Next up is the exhaust pipes. The CB200 has one beautiful exhaust pipe and one that was patched with an aluminum plate at some previous repair session (before I had the bike). The aluminum plate patch busted and the recent return to the road has cause the muffler to sag. So we "removed" the muffler.
I've come to understand that these pipes are really hard to replace and I also believe they are a one piece pipe. The header and muffler are all one unit. Check out this parts diagram...
So the conundrum is:
The cheapest solution is No.#1, quick, simple, efficient. No.#2 is out of the question because we want to ride it! Who knows when I could find one of these in good condition? (My thought is if I do come across one someday I would buy it in case we want to return the bike to stock. Again I know this is a sickness and it will never happen but its my way to justify storing a bunch of parts in the garage.) No.#3 is the best solution because it keeps option No.#2 in play, but it requires buying more parts on ebay...
Gotta go, I'm exhausted thinking about this and my auctions are closing soon...
co·nun·drum \kÉ™-ˈnÉ™n-drÉ™m\ noun a riddle whose answer is or involves a pun. co·nun·drum
I've come to understand that these pipes are really hard to replace and I also believe they are a one piece pipe. The header and muffler are all one unit. Check out this parts diagram...
Notice how there is a one next to the right pipe and a 2 next to the left pipe.
But there are no numbers on the headers? One piece.
So the conundrum is:
- Do I cut off a perfectly good original Left muffler and replace both mufflers?
- Do I search for and wait until I find a good condition original Right muffler?
- Do I buy a trashed Right muffler/header on ebay and cut it up?
The cheapest solution is No.#1, quick, simple, efficient. No.#2 is out of the question because we want to ride it! Who knows when I could find one of these in good condition? (My thought is if I do come across one someday I would buy it in case we want to return the bike to stock. Again I know this is a sickness and it will never happen but its my way to justify storing a bunch of parts in the garage.) No.#3 is the best solution because it keeps option No.#2 in play, but it requires buying more parts on ebay...
Gotta go, I'm exhausted thinking about this and my auctions are closing soon...
co·nun·drum \kÉ™-ˈnÉ™n-drÉ™m\ noun a riddle whose answer is or involves a pun. co·nun·drum
Saturday, October 3, 2009
Clubman Part 2
Saturday morning time to finish the Clubman bars.
The first point of order is to prep the bars for the wiring. The bars we got ($28 including shipping on eBay) had no holes in them and had 10" arms.
- Looking at the bike we felt the bars would be a little to wide so we cut 1-1/4 inches off each end. This was done by wrapping the bars with tape to mark the cut line and clamping them in a soft-jaw vice. A Dewalt reciprocating saw with a fresh blade made quick work of the cutting. We dressed the cut ends with a flat file on the outside edges and a round file on the inside to remove all sharp edges.
- Next we laid the old bars next to the new bars and marked the holes for drilling. Each housing has a "hockey-rink" hole for the wiring with a round hole that is for a pin on the hand control. The position of this hole determines where your grips clock. We transferred the hole patterns to the new bars and proceeded to cut them out. First I hit the bars on a grinding wheel at the place I wanted to cut my hockey-rink hole this created a flat spot to drill on. Then I hit the bars with a center punch once on the position hole and 3 times across the hockey-rink. We drilled the holes one at a time and opened the holes with progressively larger bits until the holes connected to each other. We finished opening the holes with a carbide burr bit.
- Finally we marked the center hole (where the wires exit) and drilled and burred the hole. After creating each hole we spent time hand filing each opening so there were no sharp edges to catch the wiring.
- The first order of business is to pull the wires attached to the hand controls in through our hockey-rink holes. The easiest way to do this is to get a 12" length of ball-chain. (I took my off the ceiling fan in our living room.) The cool thing about the chain is its heavy and will fall right into the bars. Also it will snake through almost any shape and fall out the hole on the other end. (Thanks Jim!) We used electrical tape and taped about 4" of chain to the wires. Try to get the bundle a small as possible. Start at the end of the chain about 4" before the end of the wiring. Then spiral-wrap tape down the harness tapering to the end. Feed the chain into the hockey-rink hole and out the center hole. Pull firmly as you push the harness into the hole. Squirt a little WD-40 to help it slide. We had to try this a couple times as it is tight and working the wiring past the 90deg bend in the Clubmans is a task.
- Reconnect the controls to the bars. Be careful not to pinch any wires, this is usually where people get shorts.
- Use a little more Windex and work the left grip onto the new bars. (Be careful on your test ride the Windex will take 24 hours to completely dry.)
- After trying to sandwich the clutch/brake cable in between the handlebars and the speedo/tach we found the brake cable was binding. So we fed the speedo/tach inside the clutch and brake cable and every thing worked fine.
- We reconnected the two bolts on the speedo/tach and then reconnected the handlebar clamps.
- We reconnected the headlamp ears to the headlight bucket and the reconnected the wires inside the headlight bucket. Ours were a color to color match except for one wire that had been previously spliced. But since we marked it and took a picture it was easy to remember where it went.
- We put the screws back in the headlamp bucket at 4 and 7 o'clock, reconnected the battery and waited for the moment of truth.
- We turned the key, headlamp on--check, neutral light on--check, hit the starter and the CB200 fired to life.
- We rechecked all out bolts (especially the bar clamps) and took the CB200 for a test flight.
Friday, October 2, 2009
Clubman Bar Conversion
The first modification for the CB200 was the handlebars. I like the more aggressive look and riding position of the Clubmans, plus they make your bike go faster. I'm not kidding. With the stock bars and upright riding position, the air you catch in your chest significantly slows down the bike and causes rider fatigue. The Clubmans get you down out of the wind and give you a little extra weight on the front tire at speed.
Step 1 Disassembly
Seems like a reasonable thing to do on a Friday night...
Step 1 Disassembly
Seems like a reasonable thing to do on a Friday night...
- Disconnect the battery.
- Remove the mirrors. They are held on with jamb nuts, loosen the nut and then unscrew the whole mirror assembly.
- First you pull the headlamp out of the housing two screws at 4 and 7 o'clock allow you to drop the headlight. (That's one screw removed at 4 pm, discussion about how good these new handlebars will look and then one screw removed at 7 pm. Based on this "bench-racing" method you'll see how long this project takes.) Lay a towel on the fender to sit the headlamp on.
- Unbolt the two nuts that hold the bucket on the ears and lay the bucket down with the lamp.
- Unbolt the riser caps. This will allow the bars to be free. Lay a towel on the tank and lay down the bars.
- Unbolt the two nuts that hold the speedo/tach cluster and lay it down with the headlamp.
- Next trace the two wire bundles that come out of the bottom of the handlebars into the headlamp bucket. Disconnect the wires at the pig-tails. Honda color co-ordinated all the wires which makes this pretty easy. But... chances are someone else has already been in this bucket and if any wires have been replaced you may not have matching colors. So this is a good time to tag every wire and take some pictures.
- Remove the rubber boots off the controls. Our bike had one. It was held on with zip ties around the wires. We cut the zip ties and carefully pulled the boot off over the brake lever.
- Release the handlebar controls. There are 2 screws in the bottom of each control.
- When you release the right control the throttle will slide off. You have to lineup the throttle cable with the slot in the grip and you can side out the cable end. The left side grip will come off with a little effort. Use Scooters trick, pryup the grip with a small screwdriver or awl and spray some Windex on the bar. Work the grip off as you spray on more Windex.
- Each hand control has a bundle of wires that go into the handlebar and exit a hole in the center. Earlier you disconnected the ends of these wires inside the headlamp. Now you gently pull the wires out of the hand control holes in the bars. (You do not disconnect the wiring in the hand controls.) Doing this requires a firm pull, but don't tear them out. To ease the pain you can spray some wd40 in the bars. Ours came out fairly easily, but I've heard/read horror stories.
- At this point you have a mess.
Thursday, October 1, 2009
How to Get your CB200 Running
What you need to do to get your Honda CB200 Running
- Clean the Carbs - fully disassemble and clean everything with carburetor cleaner. Take out all the brass parts (jets, float valve, etc.) clean or replace everything.
- I used a welders "Tip Cleaner" set. Find a welding supply store in your area and ask for a torch tip drill set. You'll get about fifteen drill bits housed in a pin vise from .0625 (1/16th) down to super small for about seven or eight bucks and they are very high quality. This will allow you to clean every passage in the carb.
- Soak the stripped down carbs overnight in a carb cleaning solution. Berryman / 1 gal. B-9 carburetor and parts cleaner with basket is $20 at AutoZone. Warning it will eat all rubber.
- Reassemble the carbs with a pair of Quality Keyster carb repair/rebuild kit made in Japan $22 each from Out West Motorcycles.
- I used a welders "Tip Cleaner" set. Find a welding supply store in your area and ask for a torch tip drill set. You'll get about fifteen drill bits housed in a pin vise from .0625 (1/16th) down to super small for about seven or eight bucks and they are very high quality. This will allow you to clean every passage in the carb.
- Drain Gas tank - clean and refill
- Remove your tank... close the petcock, pull the fuel lines, open the seat, pull back the harness at the rear of the tank, lift and slide the tank back. (No tools.)
- Empty the contents into a container. This will be varnished gas and rust.
- Remove the petcock from the bottom of the tank. the 75 uses a Phillips-head screw.
- Fill the tank with water and empty multiple times. This will float out the big loose stuff.
- Reinstall the petcock.
- Pour a pint of liquid degreaser full strength and a couple 8" lengths of medium size linked chain into the tank and slosh vigorously with all the openings capped off. (There are people who will put screws/nuts/bolts in the tank, other people report losing/not recovering all the bolts. Use a couple of chains so can make sure you get them out when you are done.)
- Add a 1/2 gallon of the hot water to the degreaser still in the tank and slosh it around again for a few minutes.
- Empty the tank, remove the chains.
- If you still have rust, fill the tank with Vinegar, let it sit overnight and then empty. Do this several times until the vinegar coming out is clear.
- Finally pour about a tablespoon of hand dishwashing liquid and about a gallon of very hot water into the tank and slosh thoroughly. Dry the tank.
- Remove the petcock, disassemble and clean thoroughly.
- Kreem the tank
- Reinstall petcock, fill with new fuel.
- Replace fuel lines with inline fuel filters.
- Change the oil. Your CB200 uses 3.6 pints (1.75 Quarts) of 10W-40. There's a large nut at the bottom of the motor. Remove that with a 19mm socket to drain the oil. There is no oil "filter" as it is equipped with a centrifugal oil filter in the motor.
- New battery - The bike came stock with the YuasaMBW3-12C. Get the Yuasa YB9-B from your local dealer, its about $30. They will fill it with acid and do the first charge on it for you. Don't think you need a new battery? Here's some good advice. http://en.allexperts.com/q/Motorcycle-Repair-837/1975-Honda-CB200-Electrical-1.htm
- New plugs - While your at the dealer pick up a new set of spark plugs. NGK D-8ES-L. If your motor has been sitting a long time while you have the plugs out you can spray a little penetrating oil inside chamber & rotate engine without the plugs in. Let this sit for 24 hours before firing the bike up.
- Check the tires and pressure. Old cracked tires on motorcycles spell potential disaster, one of the first things you'll want to do is to replace the tires. Use 80/100H-18 in the front and 90/90H-18 in the rear. At the very least check the tire pressure in the old tires 26 PSI in the front 28 PSI in the rear.
- Lube the chain. If you need to clean the chain stay away from WD-40, remove it and soak it in Kerosene. Lube the chain with a good quality chain lube and you'll be good to go!
It lives!
When we "stored" the CB200 it was running good. I turned off the petcock and proceeded to move it around the garage for 6 years occasionally wiping off the top layer of dust.
Ed Note: This is not the correct procedure for storing a motorcycle nor is it the correct procedure for starting a motorcycle that has been sitting for years.
First the throttle wouldn't turn. It was stuck. I followed the cables down to the carburetors and the left one would pull out the slide the right one was stuck. I unscrewed the cap and realized the fuel had varnished in the carburetor. I decided to remove the carb and give it a "good" cleaning.
How to remove a carb on the CB200
There are a pair of Phillips head screws that hold the carburetor onto the intake runners. I found that a 1/4 wrench with a Phillips bit taped into the closed end of the wrench gave me a short enough throat (my fancy dual 90 Phillips head screw driver was too long the bend ran into the intake bolts.) and the angle of the wrench was perfect so I could actually turn the screws a quarter turn at a time. Its not fast but the more you do it (and believe me you will do it a lot) you'll get faster.
Once I had off the carburetor unscrewed from the intake I was able to put a little gas into top of the carb and put a screwdriver in through the air intake and pushed the slide out of the top. It was n't pretty but I got the carb off the bike and wiped it down, cleaned the slide and put it back together.
Do as I say not as I do.
If you are here stop. Pull the tank and petcock, pull both carbs do a real cleaning. Get a couple of rebuild kits and do it right the first time. You might as well because as this story goes on I will R&R the tank and the carbs multiple times and eventually do it right.
The throttle cable was free and I could twist it as designed! I turned on the petcock and tried the electric starter. Click, click, click. So down the street like the Jamaican bob sledding team. Run, jump on, second gear, pop the clutch. Pop, pop, sputter, sputter, seemed to run for about 3 seconds then nothing.
I hooked-up the battery up to a charger over night and did the same drill the next day. Click, click, click. So down the street like the Jamaican bob sledding team. Run, jump on, second gear, pop the clutch. Pop, pop, sputter, sputter, seemed to run for about 6 seconds the nothing.
The next day I sent my son to the local Honda dealer who ordered a $30 battery for us and the guy at thee parts counter told him all about the CB200 he had when he was younger. He rode his to Joshua tree with a bunch of "big" bikes. He said had it pegged at 70mph the whole way but he kept up! (People... ok young people, actually ride these things.)
While we were waiting for the battery to come in we decided to see what was in the fuel tank. So we removed the tank. (Open the seat, pull back the rubber saddle, pull the fuel lines of the petcock, pull the tank back. Easy, no tools necessary. Gotta love Honda engineers.) I dumped the tank into a clear plastic container. It didn't look like gas, it didn't smell like gas, it was a reddish-brown varnish.
As gas sits it evaporates leaving behind the other stuff in gas, mix that with rust in the tank and you have a toxic waste dump. The fact that the Honda "ran" for 9 seconds on this crap is a miracle. I removed the petcock and we flushed the tank with water and floated all the crap out of the tank. I disassembled the petcock and found it was all gummed up with the reddish-brown varnish I saw on the carb slide. I got it all cleaned up pretty good and we put it all back together.
It lives.
When the battery came in we went down to the gas station and got a gallon of premium (only the best, right?) we hooked up the fresh battery (the dealer filled it with acid and charged it for us.) Guess what? It fired right up. We took it for a spin around the block and felt a sense of accomplishment. The only problem, it ran like crap and immediately fouled the right plug.
Here's some good advice:
http://en.allexperts.com/q/Motorcycle-Repair-837/CB200T-Engine-miss.htm
Wednesday, September 30, 2009
The Father Son Project
I set a goal to get all my vehicles running this summer that included the Honda. Here's the bike as it sits now. Its a bone stock, clean but not perfect 1974 Honda CB200.
Here are the goals for the project:
- Get it running.
- Update the look with Cafe Racer / Bobber styling accents.
- Maintain all the stock pieces so it can be returned to original condition.
- Have fun, ride it!
The great news is my son (now 21) has decided to help me with this project so it'll give us a few excuses to hang out in the garage together.
Tuesday, September 29, 2009
Common Modifications
Bars
Clubman or Clip-on style bars will give the bike a more aggressive riding position. If you go to these style bars you may need to go to rear-set controls.
Note: We've installed Clubmans and it didn't require rewiring or replacing clutch/brake cables.
Tire Sizes:
90/90H-18 Front 110/90H-18 Rear
Note: I used 90/90H-18 Front 100/90H-18 Rear. Both fit with no rubbing on either fender except I had to move the rear brake stay to the outside of its bracket.
Air Filters:
Some people like to try pod filters. Be sure to keep your air box for when you decide to go back to stock. Pods can be difficult to tune and OEM air boxes can be hard to find.
Carburetors:
- 24mm carburetors from the Honda SL350K1
- Keihin PE24 race carbs
Cams:
- Megacycle Street Camshafts #135-X1 for stock pistons (1974-78)
- Megacycle Race Camshafts #135-x9 for 1mm over race pistons (1974-78)
Source: http://www.teknikka.com/wiki/index.php/Honda_CB200
Monday, September 28, 2009
Before you Start
If you are going to fix-up/restore a CB200 visit these forums first. Go into each forum and search CB200 and you will find a wealth of information.
Here's a couple of great blogs to see what others have faced:
Buy this book:
Here's a couple of great blogs to see what others have faced:
Buy this book:
- Clymer Honda 125-200cc Twins 1965-1978 - Chapter one, general information: manual organization, service hints, tools, expendable supplies, mechanic's tips, safety first. Chapter two, lubrication and maintenance: engine tune-up, clutch, brakes, steering stem bearings, wheels and tires, battery, drive chain, fork oil, oil and filter, swinging arm. Chapter three, troubleshooting: operating requirements, starting difficulties, poor idling, misfiring, flat spots, overheating, backfiring, engine noises, piston seizure, excessive vibration, clutch slip or drag, poor handling, brake problems, ignition system problems, charging system, electric starter problems, lighting problems, horn problems. Chapter four, engine, transmission and clutch: service hints, engine removal, preliminary engine dismantling, clutch and oil pump, shifter mechanism, cylinder head, cylinders and pistons, cam chain tensioner, crankcase, crankshaft, transmission, shift cam and shift forks, final engine reassembly, engine installation. Chapter five, fuel and exhaust systems: carburetor overhaul, carburetor adjustment, miscellaneous carburetor problems, carburetor specifications, fuel tank, exhaust system. Chapter six, electrical system: ignition system, charging system, electric starter, lights, headlight, tail/stoplights, horn, battery service, wiring diagrams. Chapter seven, frame, suspension and steering: handlebar, fork top bridge, steering stem, wheels, front fork, brakes, rear suspension, drive chain.
- Honda CB200 Workshop Manual - This workshop manual has been prepared as a “ service guide” for the mechanics responsible for the upkeep of the Honda CB200 and CL200. This workshop manual is compiled into six sections and summarizes the procedures for disassembling, inspecting, repairing, and reassembling the components of the machine. This manual is based on CB200, with added explanation and photos on CL200 except for minor differences. All information, illustration and specification herein are based in the 1973 model. The workshop manual is divided into chapters covering discussion on service precaution, inspection and adjustment, engine, electrical and service data of the motorcycle model.
Sunday, September 27, 2009
The Cafe Bobber
I started digging around the internet and found a few cool CB200's that others have modified into mini-cafe bikes. I think this is a perfect treatment for these bikes and we decided to use this as the inspiration for our bike. This is my photoshop mock-up of the "goal".
Thoughts on this design:
- We will use Clubman bars instead of clip-ons to keep the hand position up and back a little more.
- I want to build the seat on an original pan so they can be swapped for 2-up riding. (no farther than around the block after-all its only got 17hp.)
- As a tip of the hat to the bobber style I like the red rims. Deal with it.
- I think I'm going to keep the front fender and I think I want to fabricate a matching rear fender that is mounted to the shocks/swingarm. I haven't seen one done like this.
Saturday, September 26, 2009
Any color you want as long as it is gold or silver.
Check out this list of 75 CB200 facts
- Also referred to as CB200T0
- It came in two colors: Candy Gold Metallic and Custom Silver Metallic
- The fuel tank and side covers are the basic color
- The "CB200T" side cover emblem was white and yellow
- The front disc brake was cable operated.
- The engine was a 198cc OHC parallel twin linked to a 5-speed transmission
- The serial number began: CB200-2000001
Friday, September 25, 2009
You meet the nicest people on a Honda
This is the background on this project bike. In the summer of 2003 I was in Sturgis, SD for the annual rally. I was working for a custom motorcycle manufacturer who was displaying at the event. While we had a tractor trailer full of shiny new choppersbut I found myself without a bike to ride in a town that was bumper-to-bumper traffic. So I did what any red-blooded hard-core biker would do... I bought a Honda CB200 to ride around town all week.
I picked up this little beauty for $1200. The same number of miles on the ODO. It was a one-owner, stored in a garage, all original and recently serviced gem. I bought it from a dealer (Biker Bob) who was there working our display.
The most fun I had all week was waiving to people and getting the thumbs-up all over town. It seems everyone has owned or ridden a small Honda in their riding career. (Me too, my first bike was a Honda mini-trail I rode all over the neighborhood.)
I brought the CB200 home from Sturgis, rode it around the neighborhood a couple times, let my 15 year old son tear up the street on it and land it in the neighbors hedge and then I parked it in my garage for six years.
Subscribe to:
Posts (Atom)